NFTs, or non-fungible tokens, have opened a new era of digital ownership. From digital art and gaming items to collectibles and virtual land, NFTs represent verified ownership of unique digital assets on the blockchain. While most people associate NFTs with Ethereum, a growing number of users now prefer Polygon, a faster and cheaper network for NFT ($0.00) trading.
If you’re new to NFTs, Polygon is one of the best starting points. It offers low gas fees, wide marketplace support, and full compatibility with Ethereum-based tools. In this beginner guide, you’ll learn how to buy your first NFT on Polygon step by step — from setting up your wallet to completing your first NFT purchase.
What Is Polygon and Why Use It for NFTs?
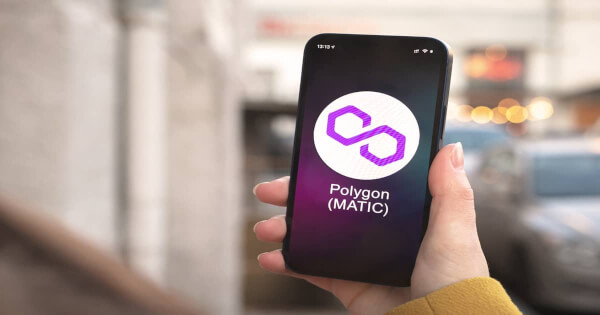
Polygon (MATIC) is a layer-2 blockchain built to scale Ethereum. It enables faster transactions and much lower fees while maintaining compatibility with Ethereum’s smart contracts.
Here’s why Polygon is popular for NFT buyers:
- Low fees: Gas costs are a fraction of Ethereum’s, often less than a cent.
- Speed: Transactions confirm within seconds.
- Compatibility: Works with wallets and dApps originally built for Ethereum.
- Broad ecosystem: Supported by major marketplaces like OpenSea, Magic Eden, and Rarible.
If you’ve ever avoided buying NFTs due to high Ethereum gas fees, Polygon is the perfect solution.
Step-by-Step Guide: How to Buy Your First NFT on Polygon
Let’s walk through the entire process of buying your first NFT on Polygon. You’ll only need a crypto wallet, some MATIC tokens, and an internet connection.
Step 1: Set Up a Crypto Wallet
Before you can buy an NFT, you need a digital wallet to store your tokens and collectibles. The most popular choice is MetaMask, which supports Polygon and Ethereum.
How to set it up:
- Go to MetaMask.io and download the browser extension or mobile app.
- Create a new wallet and write down your seed phrase (keep it private).
- Set a strong password to protect your wallet.
Your wallet is your key to the Web3 world. Never share your seed phrase with anyone.
Step 2: Add the Polygon Network to Your Wallet
MetaMask is configured for Ethereum by default. To use Polygon, you must add the network manually.
Here’s how:
- Open MetaMask and click your profile icon → Settings → Networks → Add Network.
- Enter these details:
- Network Name: Polygon Mainnet
- RPC URL: https://polygon-rpc.com
- Chain ID: 137
- Currency Symbol: MATIC
- Block Explorer: https://polygonscan.com
- Network Name: Polygon Mainnet
- Save the settings and switch to the Polygon network.
Now your wallet can connect to dApps and marketplaces built on the Polygon network.
Step 3: Buy or Transfer MATIC Tokens
MATIC is Polygon’s native cryptocurrency. You’ll need it to pay for NFT purchases and small gas fees.
Option 1: Buy MATIC on an Exchange
- Use exchanges like Binance, Coinbase, or KuCoin to buy MATIC with your local currency or stablecoins.
- After purchasing, withdraw the MATIC to your MetaMask wallet address on the Polygon network.
Option 2: Bridge from Ethereum
If you already have ETH ($4,015.36), you can bridge it to Polygon using the Polygon Bridge at https://bridge.polygon.technology.
This converts your ETH or ERC-20 tokens into Polygon-compatible versions.
Always double-check wallet addresses before sending tokens.
Step 4: Choose a Polygon NFT Marketplace
Polygon NFTs are available on several popular marketplaces. The top options include:
For beginners, OpenSea is the easiest platform to start with since it supports both Ethereum and Polygon seamlessly.
Step 5: Connect Your Wallet to the Marketplace
Once you’ve selected a marketplace, connect your wallet to start browsing NFTs.
Example: Connecting MetaMask to OpenSea
- Go to OpenSea.io.
- Click the wallet icon in the top-right corner.
- Choose MetaMask and approve the connection.
- Make sure you’re using the Polygon network (not Ethereum).
You’ll now have a personalized dashboard showing your wallet address, favorite collections, and past activity.
Related article: Top Free Crypto News Aggregators for Daily Market Updates
Step 6: Explore and Choose Your NFT
Now comes the fun part: browsing NFTs!
To find Polygon NFTs on OpenSea:
- Click Explore on the menu bar.
- Use the filter “Chains → Polygon” to display only Polygon NFTs.
- Browse collections, view creator profiles, and check rarity traits.
Tips before buying:
- Verify the project or artist’s authenticity.
- Look for the blue verification badge (especially on OpenSea).
- Read metadata details and transaction history on Polygonscan for transparency.
Step 7: Buy Your NFT
Once you’ve chosen an NFT you like, you’ll see two options:
- Buy Now: Instantly purchase the NFT at a fixed price.
- Make Offer: Bid a custom amount if the seller accepts offers.
To buy:
- Click Buy Now and review the purchase details.
- MetaMask will prompt you to confirm the transaction.
- Approve it, and within a few seconds, your NFT will appear in your wallet under the Polygon network.
Congratulations! You’ve just bought your first NFT on Polygon.
Step 8: View and Manage Your NFT
You can view your NFTs in:
- MetaMask: Under the NFT tab (enable NFT display in settings).
- OpenSea Profile: Your purchased NFTs appear under “Collected.”
- Polygonscan: Use your wallet address to see transaction history.
You can also list your NFT for sale later if you want to trade or collect profits.
Tips for Buying NFTs on Polygon
- Double-check links: Only use official marketplace URLs to avoid scams.
- Beware of fake collections: Verify creator profiles and social media pages.
- Avoid emotional purchases: Always research the project’s community, roadmap, and utility.
- Keep gas fees in MATIC: Always maintain a small MATIC balance for transactions.
- Backup your wallet: Store your recovery phrase offline and never share it.
These best practices ensure a secure and smooth NFT journey.
Advantages of Buying NFTs on Polygon
- Low transaction costs: Average fees are under $0.01.
- Fast confirmation times: Transactions complete in seconds.
- Eco-friendly: Polygon uses a proof-of-stake system with lower energy consumption.
- Access to top collections: Many popular Ethereum-based projects also deploy on Polygon.
With these benefits, Polygon is quickly becoming the preferred network for NFT beginners and traders.
Related article: How AI Helps Crypto News Aggregators Filter Noise in 2025
Conclusion
Buying your first NFT on Polygon is one of the easiest ways to start exploring Web3. With lower fees, fast transactions, and access to major marketplaces, Polygon removes many of the barriers that beginners face on Ethereum.
By following these simple steps — setting up your wallet, adding MATIC, and connecting to a marketplace — you can join the NFT revolution confidently. Whether you’re collecting digital art or exploring metaverse assets, Polygon offers a smooth, affordable entry point into the world of NFTs.
FAQs
1. Why should I buy NFTs on Polygon instead of Ethereum?
Polygon offers much lower gas fees and faster transactions while maintaining compatibility with Ethereum-based marketplaces and wallets.
2. Do I need MATIC to buy NFTs on Polygon?
Yes. MATIC is required for both purchasing NFTs and paying small gas fees during transactions.
3. Can I transfer my Polygon NFTs to another wallet?
Yes. You can send NFTs to any wallet address that supports the Polygon network, but make sure both wallets are on the same chain.
4. Is buying NFTs on Polygon safe?
Yes, as long as you use verified marketplaces and keep your wallet’s private keys secure.5. Can I sell or list my Polygon NFT later?
Absolutely. You can relist your NFTs for sale at any time on supported platforms like OpenSea, Rarible, or Magic Eden.
The post How to Buy Your First NFT on Polygon: Beginner’s Step-by-Step Guide appeared first on FXcrypto News.










 24h Most Popular





 Utilities